Try Also
-
x
-

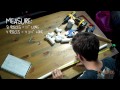
DIY production - DIY gimbal dji ronin #tinniDIY episode1
11:48
video ini adalah video tutorial untuk membuat gimbal atau imagestabilizer yabg bisa temen temen buat sendiri di rumah total biaya yang di keluarkan untuk membuat gimbal ini sekitar 150rb jadi tunggu apalagi yu kita buat gimbal sendiri bahan-bahanya :
1 pipa paralon
2 laher / bearing
3 sambungan pipa L
4 sambungan pipa T
5 handle camera tipe c
6 baut + mur 10
7 bauit + mur 12
8 busa handle motor
ok jangn lupa subscribe ya thank u -
DSLR Camera Stabilizer for Under $5 - Homemade Film School
3:10
Watch all 3 parts to create your own DIY Camera Stabilizer.
NEXT WEEK: Teenage Mutant Ninja Turtles! -
Watch Part 1: Preparation
Watch Part 2: Build
Dustin McLean shows you exactly how to make a homemade Handheld Camera Rig for $5. Part 1 covers all the Preparation. Part 2 shows you how to build the rig. Part 3 gives you examples on how to use the rig in action to deliver highly cinematic shots... for under $5!
Homemade Movies serves up creative remakes of your favorite movies, trailers and original songs. All videos are exact shot-for-shot remakes created at home without any visual effects. It's sweded movie magic from acclaimed director Dustin McLean! Be sure to leave a comment below for what movie you want to see homemade next.
Directed by Dustin McLean
Produced by Jon O'Brien and Dustin McLean
Created by DustFilms
Watch the Video
-
x
-
ZEROGRAV GYRO STABILIZER by Flashpoint
1:38
Experience a extra level of mastery over the challenge to tame camera movement with the new Flashpoint ZeroGrav G 2-Axis Digital GYRO Stabilizer for your DSRL or BMCC! This gyroscope accelerometer grip is a new generation of high strength,high efficiency 2-axis precision devices, detecting the angular velocity and acceleration of the camera in three dimensional space, calculating the camera position, providing an amazing level of stability assistance for the most complex motion tasks. The gyros within compensate for any and all unstable movements when they are calibrated correctly. A lithium powered gyro motor, through calibration of inertial measurement in tandem with the sensors, softwareparameters and application, controls Pitch and Roll/Yaw. You can greatly increase the speed at which you are able to handle the action or enhance the illusion of dreamlike floats through space. The affordable cinematographer's tool takes you places you never dreamt of for a serious fraction of the price ofpreviously available technologies.
Flashpoint is a world-leading manufacturer of professional photography equipment used by industry professionals who want superior results. Flashpoint produces the highest quality products our market has to offer and the unmatched customer service.
FLASHPOINT LINEUP:
-

$15 DIY steadicam in 15 minutes!
5:53
In this Awesome Directors Project tutorial, filmmaker Zach King demonstrates how to build a $15 DIY steadicam in under 15 minutes.
[[ Shopping List ]]
Power Drill:
Galvanized Steel Pipe:
1/2 inch Metal T Joint:
Metal End Caps:
½ inch Metal Flange:
1 inch thick wood:
¾ inch Screws:
¼ inch Machine Bolt:
Washer:
2.5 pound Weight Plate:
Post questions for Zach at
Watch the rest of Zach King's Awesome Director episodes: -
TUTORIAL : mebuat steadicam dengan pipa PVC - ala anak KOST
12:27
halo kaum anak kost,bagi kalian yg punya hobi mahal seperti videography ini.kalian jangan bingung untuk bisa mempunyai stadycam karna uang kalian yg sangat minim wkwk,nih aku kasih trick biar bisa mendapatkan stadycam dengan uang yg bisa menyesuaikan kantong anak kost.di video ini aku memberikan cara untuk membuat stadycam dengan bahan yg ada di sekitar kalian,yaitu dengan pipa pvc,oke dari pada penasaran gimana jadinya,yuk di tonton terus di terapkan yeeee :D
-
x
-
Homemade Camera Stabilizer
6:40
The device is known as a gimbal. It functions to hold a camera of any kind in a relatively stable position. The camera can rotate on many different planes while staying level.
It is made from a few short pieces of different diameter plastic pipe. The metal pieces on the bottom of the long threaded rod hold the camera in the upright position, and can be adjusted to steady the shape and size of many different cameras. -
Hasil Video Dengan Stabilizer Dan Tanpa Stabilizer
3:17
Hasil Video Menggunakan Stabilizer Dan Tanpa Stabilizer (Low Budget Stabilizer Smartphone Test Run Part2)
Di video kali ini mereview sedikit stabilizer buatan saya, dan menunjukan perbedaan hasil rekaman video yang menggunakan stabilizer dan yang tidak menggunakan stabilizer.
Maaf ya kalau videonya jelek, soalnya cuma di videoin pakai smartphone.
Song: JIKES (Ft. Nori) - Let's Fly Away Pt.2 [NCS Release]
Provide to nocopyrightsound
-
Camera Stabilization
4:29
David Malan and Dan Coffey take a look at camera stabilization and Freefly System's Movi M10. They look at how it works and subject it to a few tests.
-
Good & Affordable Steadicam
13:15
Get the film look with this awesome steadicam stabilizer called Yelangu s60t. It's affordable so it's perfect for indie filmakers. You get the steadycam in a small bag together with a manual, a hex key and some extra weights. It's made out of carbon fiber, and weights only 800 grams without the weights.
The key elements of a good steadicam is the three axis gimbal with the yaw axis, pitch axis, and roll axis, the option to adjust the camera back and forth and side to side, adding weights and adjusting it up and down. The Yelangu s60t have it all, and it's easy to adjust.
The Yelangu s60t can handle cameras up to 3kg, so DSLRs are perfect. If you are using DSLR cameras or smaller, and do take care of your equipment while traveling, the Yelangu a60t is exactly the product you need. Actually it’s cheaper then to build one yourself.
UPDATE: I bought mine at the IBC exhibition in Amsterdam September 2015 for $50. The price may vary from place to place, so be sure to do some research before buying :) Here is a link to where you can buy the Yelangu S60T for the best price and it’s safe:
We didn't know if this was a trustworthy site, but then a user called F9000LIi (se comment section) ordered it from this site, and he commented that he received it and was very happy. So thanks for helping out F9000LIi :)
Subscribe to stay tuned for more upcoming videos!
See the shortfilm Eskild had flash backs to here:
See the video about the great wireless slider here:
Music by Thomas Leypoldt:
Thanks to Eskild Fors:
Tor-Andre Stuland
Nicolai Stigar
Håvard Sethre
Follow me on Facebook: facebook.com/Andyaxproductions
axp.no -
x
-
Best Cheap Stabilizer? Flycam Flyboy-III Review!
3:54
This is my review of the Flycam Flyboy-III Stabilizer. This is a budget oriented stabilizer that performed quite well! If you enjoyed this video make sure to subscribe and follow me on twitter. Thanks so much for checking this one out and I hope to see you around here again
@zblickerz
Intro Music: Ear2ThaBeat - Take Me Away (instrumental)
Background Music: Chance The Rapper - Acid Rain (Instrumental) -
Camera Stabilizer Rig for Under $5
10:02
An easy and inexpensive way to steady handheld shooting is the two-handed stabilizer rig, much like the retail Figrig. Here's how to make one.
PARTS LIST
4x 1/2 PVC pipe 6 in length
4x 1/2 PVC pipe 4 in length
1x 1/2 PVC pipe 3 3/4 in length
1x 1/2 PVC pipe 1 1/2 in length
5x 1/2 PVC T-joints
4x 1/2 PVC 90 degree elbow joints
1x 1/2 PVC plug
1x 1/4-20 machine screw 2 1/2 in length
2x 1/4 nuts
1x spring
Optional camera quick release system
eBay:
Amazon:
PVC ratcheting cutters
Harbor Freight Tools:
eBay:
Amazon:
Sports grip tape
Amazon:
eBay:
Blog:
Facebook Group:
Twitter Feed: -
5$ Gimbal Action Camera stabilizer - homemade tutorial DIY
2:46
how to make a gimbal - I made a manual Gimbal stabilizer because honestly its too expensive to buy one. hahaha. I don't want to spend that much on this thing so why not build one for myself and even share it to everyone..It only cost me 250 Pesos or equivalent to approximately $5.. If you have questions about this video feel free to drop a comment. hit like and subscribe for more tutorials. =)
▼▼▼▼▼▼▼▼▼▼▼
✔Support me on Patreon:
or use my amazon affiliate link when shopping online
Amazon Affiliate link:
★You can buy the Materials I used on my amazon links below
Materials:
✔Corner Brace steel - (affiliate)
✔2 pcs tamiya bearings - (affiliate)
✔Bolts and nuts - (affiliate)
✔Clear epoxy -
✔kids scooter handle
✔4 pcs Plastic bottle caps
✔1 pc wood
✔Gimbal Sketch is in my facebook page Brains techKnowlogy
★Want to buy real Gimbal? check it here on my affiliate links:▼
✔- Zhiyun Z1-Pround 3-Axis High-Precision Handheld Steady Gimbal: (affiliate)
✔- Feiyu Tech G4 3-Axis Handheld Gimbal: (affiliate)
✔- cheap gimbal:
How to make camera stabilizer :
Music: Easy winners
outro Music: Groovy Hiphop - bensound.com
Disclaimers: This Video Contains Affiliate link which means when you click on the link and buy something I get a very small commission to support my youtube channel. -
Gimbal Steadicam
3:01
DIY Gimbal Prototype using one 25-52mm roller bearing, 50mm pvc pipe, two 8-15mm roller bearing, pvc pipe holder and a light stand.
-
DIY: Cheap Steadycam / Camera Stabilizer for $5 Only
7:54
This video tutorial is about making a cheap steadycam / camera stabilizer for $5 only. (some people call it gimbal).
It will makes video recording smoother, even though (of course) we can't compare it with the $50 steadycam in the market.
You can use this cheap camera stabilizer to mount light / pocket camera or your action camera (Go Pro Hero, Sjcam, Xiaomi Yi, Gitup G2, Etc).
Basically you don't need any tool to make this steadycam (except sand papper), even a kid can make this project.
---------------------------------------- Indonesia: --------------------------
Cara membuat steadycam / camera stabilizer dengan biaya tidak lebih dari Rp. 50.000,-
dengan menggunakan steadycam akan membuat hasil perekaman video terlihat lebih halus / tidak banyak guncangan.
Tentu saja hasilnya tidak akan sebagus steadycam beneran, tapi masih lumayan daripada tidak menggunakannya.
Untuk bahan-bahan yang dibutuhkan bisa didapat dengan membeli secara online di Bukalapak atau Tokopedia. -
DIY $13 Camera Stabilizer
3:51
See more from Tall Sea Productions at
This is a video tutorial on how to build your own camera stabilizer! It's called the PVC Stabilizer for what I'm calling the Prosumer's Video Choice and also because it is made mostly from Polyvinyl Chloride piping.
This device can be made for less than $13, depending on what you already have handy. Sure beats paying $1000's for one by a major brand!
Materials needed:
3 - 3/4 PVC pipe caps
3 - 3/4 PVC elbows
1 - 3/4 PVC cross
2 - 3/4 PVC pipes (2 ft each)
1 - 1/2 PVC pipes (2 ft)
1 - 3/4 metal nipple
1 - standard tripod head mount
2 - 2.5 lb dumbbell weights
If you make your own PVC Stabilizer, please post a comment or video response letting me know how it worked out for you!
© 2012, PVC Stabilizer by Collin McDowell
-
x
-
DIY 2-Axis Steadicam Style Camera Stabilizer Gimbal Assembly Instructions
3:04
Get yours today at:
Assembly instructions for our new 2-axis Steadicam style camera stabilizer gimbal kit.
Over the years we have received numerous emails from customers working on building their own DIY stabilizers who were missing key components, which is why in 2012 we opened the DIY garage. Stocking many of the parts that have given our customers countless years of great service, as well as several new designs, giving customers more resources to build exactly what they want.
Looking for a 3-axis gimbal? We've got those too!
Check it out at the link below:
NEW! - Low budget 3-Axis Gimbal:
Like us on Facebook
Follow us on Twitter
Join us on Google+
STEADICAM® is a registered trademark of The Tiffen Company. -
Camera gimbal: Zhiyun Crane stabilizer review
4:10
Buy the gimbal and get 10% discount with code FENCHEL: or buy at B&H; Bestellungen Deutschland: (Deutscher Shop)
Moritz from Fenchel & Janisch reviews the Zhiyun Crane ($650) which is a hand-held 3-axis gimbal that is designed for DSLRs and mirrorless cameras with a weight up to 1.2kg. The camera stabilizer can rotate all three axis 360°.
Blog post:
Watch more sample footage here:
Music by PremiumBeat.com:
Stay connected with filmmakers Fenchel & Janisch:
Facebook:
Instagram:
Twitter:
Flickr:
500px:
© 2016 by Fenchel & Janisch Filmproduktion GbR
=======================
about FENCHEL & JANISCH
=======================
Marcel Fenchel and Moritz Janisch are a team of filmmakers based in Frankfurt, Germany.
Their film production company, Fenchel & Janisch, produces commercials and corporate videos for a broad variety of companies from different branches.
Since the start of the DSLR revolution their goal is to provide interesting and straight to the point filmmaking and editing tutorials for beginners and advanced film enthusiasts from all over the world.
Besides famous tutorials like “The ultimate Introduction to DSLR Filmmaking” or “How to get the Filmlook” that both got over 1 Million views on YouTube, Fenchel & Janisch also share technical gear reviews, short films and behind the scenes videos. The documentary “Format Frankfurt” was entirely shot with HD DSLRs over a period of three years. The full-length film premiered in May 2014 in German cinemas and is available on video on demand:
Find out more about the work of Marcel Fenchel and Moritz Janisch at -
Mini DIY 3-Axis Modular Camera Stabilizer
8:34
Around a diy 3-axis gimbal, I built a modular design, camera stabilizer. Flexible in setup, for small cameras, from an action cam up to a small mirrorless camera.
link to BLRTRONICS :
MUSIC: Monday Morning by Farnbach+Spieb
I am sorry for any spelling or syntax errors -
Membuat Lampu Penerang Action Camera
12:50
Saya menjelaskan bagaimana cara membuat lampu tambahan untuk pencahayaan untuk merekam video atau memfoto di saat malam hari. Anda bisa mengembangkan lampu tersebut dengan cara anda sendiri sesuai dengan kebutuhan anda. Jika kurang jelas silahkan tanya di kolom komentar. Jangan lupa Like, Subscribe dan Share.
Fb : Munif Amin Romadhon (
Twitter : @MunifAmin89 (
Instagram : @MunifAmin ( -
$10 DIY Camera Slider!
9:40
For pro sliders check out Kessler Crane!
It's the most requested DIY build we've gotten yet! So today we finally throw together a cheap and easy build for a DIY slider, that is also very effective!
Shopping List:
2- Deep Handy Box
2- 3/4 PVC Tee:
2- 3/4 PVC Coupling:
PVC Cutter:
#6 - 32 x 2 in Machine Screws:
6-32 Machine nuts
Drill
1- Drill bit:
1- 3/4 PVC Pipes:
1- 1/2 EMT:
4- 1/2 EMT Connecters:
---------------------------
More DIY filmmaking tips:
$25 Shoulder Mount:
$20 DSLR Shoulder Rig:
$10 Light Stand:
FilmRiot on Revision3:
Twitter
Ryan on Twitter
Facebook
Ryan on Facebook
-
Membuat Stabilizer Camera Low Budget | Test Part #2
1:08
SUBSCRIBE:
hanya sedikit perubahan yang terlihat dari test tersebut, tapi dengan memakai alat ini penggunaannya menjadi lebih efisien dan lebih enak untuk mengambil gambar.
thanks for watching :) Subscribe GRATISSS!!!
Twitter :
Facebook :
Instagram :
ASKFM : -
FlyCam 3-Axis Steadicam Rig for DSLR
5:50
This Vid is the sample video of FlyCam 3-Axis Steadicam rig for DSLR.
Controller : FlyCam BLGC (BrushLess Gimbal Controller) - 3Axis
Tested Camera.
Canon 5D Mark III + CP 21
Panasonic GH3 + 12-35mm
-
The Merricam - No-Cost Steadicam DIY
5:00
Support an indie filmmaker and like this on Facebook:
This video will show you my way of converting a tripod to a camera stabilizer (or MerriCam) using only a screwdriver. I used the Sunpak Platinum Plus 7500 Pro tripod for this video, along with the Canon HV20. All demo shots were done with no practice.
This technique is not meant for very large or heavy cameras, but is ideal for consumer-sized camcorders and lighter DSLRs like the T3i and (maybe) 60D. -
Review Cinema Mount - Aksesoris Kamera Smartphone untuk Foto dan Video
2:57
Salah satu aksesoris yang dapat menunjang kegiatan merekam video dan menjadikan smartphone serasa kamera SLR adalah Cinema Mount. Dengan tambahan aksesoris ini, kamu bisa menggunakan smartphone menjadi lebih optimal untuk merekam video atau memotret, baik menggunakan tripod maupun menggunakan tangan. Berikut ini ulasan mengenai Cinema Mout.
Artikel reviewnya klik disini:
Music by: Alan Walker - Force [NCS Release]
-
Homemade 3 axis steadicam for DSLR on alexmos first test with Canon EOS 6D
35
Short test on EOS 6D
For more watch -
DIY Camera Slider, Solusi Video Cinematic dengan Slider Low Budget
5:29
SUBSCRIBE
DIY Camera Slider, Solusi Video Cinematic dengan Slider Low Budget
Semoga Bermanfaat -
DIY DSLR Steadicam Silver Flyer Stabilizer
7:36
A step by step tutorial on building your own steadicam for a fraction of the price of a professional steadicam.
Parts List:
(2) 3/4 90 degree elbow metal tubing
(3) 3/4 metal tubing couplers
(1) 1/4 Hex screw
(1) 1/4 Nut
(1) 5/16 x 1 Fully threaded hex screw
(1) 5/16” Nut
(2) 1/4” x 3” Hex screw
(2) 1/4” Nut
(~50) 1/4” center x 1 1/4” diameter fender washer
(2) 1/4” Butterfly nuts
(1-3) Standard bearings (for how much it turns)
(1) 1/2” PVC pipe 5-8 inches long
(1) 1/2” PVC pipe male and female adapter (2 parts)
(1) Traxxas 1651 set (3 pieces per set):
(1) Macro Slider :
(1) Quick release plate:
-Drilling (in order)
Initial holes are drilled through the front and back of the pipe (must be centered). The hole closest to the pipe ending will be widened to 1/4 through both sides. The farthest hole will be widened to 1/2 on the bottom, and 3/8 on the top.
The couplers will have a hole drilled through the back after the initial hole it came with has been widened with a 1/4 bit. Do this for both the top and bottom couplers.
NOTE: Do not drill until you are certain you are using the correct sized bit in the correct location. Use the video as a reference.
-Balancing
After your steadicam has been created, balancing it will be the toughest part. the bigger the camera, the more weight you will need on the bottom. Once you have it mostly balanced except for small tilts and leans, you're ready for final tweaks. You can tweak which way your steadicam tilts by rotating the bottom coupler to counteract the weight of the camera. Magnets are an optional weight that are extremely useful as they can be placed anywhere. If you find your steadicam wont balance no matter what, add more weights.
The amount of bearings is based purely off of preference. After the initial bearing, add one or more above that one to reduce the turning sensitivity.
Music by Pink Slip - and Jordan Elgie -
Visit our:
WEBSITE:
FACEBOOK:
GOOGLE +:
TWITTER:
RSS SUBSCRIBE: -
DIY Steadicam™ // How-To
6:05
For more info on how to create your own DIY Steadicam (camera counter balance) visit
GoPro camera test footage:
MORE PROJECTS, POSTS AND EVENTS
Want to support ILTMS? There are lots of ways .. find out more at
BUY A SHIRT, STICKER OR A HANDMADE ITEM!!
FOLLOW:
After I got our of college, I was the “grown up” among my friends (most of whom were still in school). They were living in small apartments, eating too much pizza, going to the beach a 3 am. I was married, had a house… and a workshop.
The fact that I loved to make things worked really well with the fact that a bunch of my art student friends didn’t have access to the tools and space that they wanted to accomplish their art. One of my really good friends (the extremely talented Anthony Dodero) was shooting some film work and wanted a couple of simple jigs to get improve the shots. One of them involved cantilevering a camera out a car window (crazy, dangerous, etc) but the other was pretty easy to figure out.. a really simple camera counter balance.
Steadicam is a brand name, but the word has become synonymous with a unit to help stabilize hand held camera shots. The real Steadicam units are often MUCH larger and are mounted to a chest harness to help distribute the weight of the rig to your torso. Since we were looking for something on a college student budget, we went with steel pipe from a big box store.
Check out this really simple build below, and if you’ve got suggestions for add-ons/improvements please leave them in the comments!
Here’s what you’ll need:
(purchasing via these affiliate links supports ILTMS)
3 lengths of 3/4″ steel pipe
3/4″ steel pipe T fitting
1/4-20 x 1 ” screw and two 1/4-20 nuts
2 3/4″ steep pipe caps
1 3/4″ steel pipe flange
1″ PVC pipe (about 6″ in length)
Duct tape
Flat black spray paint
I started with some 3/4″ steel pipe, fittings, PVC and some bolts & nuts.
It’s really simple, I screw the pieces together, except for the top cap.
I drilled a hole through the top cap, using a clamp to stabilize it.
I pushed a screw up through it and tightened on a nut. A second nut was added, but not tightened.
Then the cap was added to the assembly.
This is essentially finished, but there’s a lot of friction when you hold the pipe directly.
I cut a piece of 1″ PVC pipe a little longer than my fist.
I cut it in half on the bandsaw.
Then I cut it into quarters. Only three of the four are needed.
A sanding block removes the burrs very quickly.
I needed to remove the angle from the cut edge using a belt sander.
This is what they looked like afterward. All three pieces needed this.
The pieces then fit perfectly around the steel pipe.
I laid out a bed of duct tape then laid the PVC pieces in place, outer edge to outer edge.
Using a sharp knife, I trimmed off the tape from the top and bottom.
Then I trimmed off the tape from one side.
The PVC wrapped around nicely, and the remaining tape folded over to make it into a sleeve.
Here you can see why the corners needed to be removed.
After removing the sleeve and the screw/nuts, I sprayed the whole thing black.
I screwed the flange into a scrap of wood to use as a clamping base.
In this case, I clamped a brick to counter weight the camera, but this can be swapped out with whatever weight item needed.
Last I screwed on the camera, and tightened the nut up to it snuggly.
I have three side by side tests in the video above! Second channel: bit.ly/iltms-2 -
DSLR Camera Stabilizer for Under $5 - Homemade Film School
5:32
Watch all 3 parts to create your own DIY Camera Stabilizer.
NEXT WEEK: Teenage Mutant Ninja Turtles! -
Watch Part 1: Preparation
Watch Part 3: Shoot
Dustin McLean shows you exactly how to make a homemade Handheld Camera Rig for $5. Part 1 covers all the Preparation. Part 2 shows you how to build the rig. Part 3 gives you examples on how to use the rig in action to deliver highly cinematic shots... for under $5!
Homemade Movies serves up creative remakes of your favorite movies, trailers and original songs. All videos are exact shot-for-shot remakes created at home without any visual effects. It's sweded movie magic from acclaimed director Dustin McLean! Be sure to leave a comment below for what movie you want to see homemade next.
Directed by Dustin McLean
Produced by Jon O'Brien and Dustin McLean
Created by DustFilms
Watch the Video
-
Kumba Cam 3 Axis Smartphone Stabilizer Review
5:40
Buy it on amazon:
Subscribe for more videos:
This is compatible with phones up to 6, and yes Nexus 6 included. This is not a selfie stick. This is much, much, more. Watch the full video for details. Check it out on KumbCam.com:
~~~~
Want to be a tech reviewer? Here's the gear to get started:
Click to subscribe:
Follow me on G+:
Tweet me: -
Free Gopro Grenade Bobber Grip | Vlog 223
3:42
Cara membuat Free Gopro Grenade Bobber Grip.
Jika Anda menikmati video ini tolong SHARE videonya!
Ikutlah meetup atau Google hangout berikutnya dengan klik,
The Primal Blueprint 21Day Challenge
Follow me :)
✩ FaceBook -
✩ Instagram -
✩ Twitter -
✩ Website -
✩ Gereja Kami
✩ Pos - Martin dan Julie Johnson P.O. BOX 1016 Yogyakarta, DIY 55000
KAMERA DAN ALAT-ALAT KAMI
✩ Kamera utama -
✩ Semua kamera dan alat-alat kami -
Sampai jumpa pada video berikutnya,
Martin -
Cara Umum Setting Stabilizer
2:02
Stabilizer memberi hasil yang mengagumkan pada setiap video Anda. But, setting stabilizer sebenarnya cukup melelahkan. Kami ingin menunjukkan sebenarnya apa sih yang perlu dilakukan untuk mensetting stabilizer. Check it out! Sudah ingin pakai stabilizer? cek the available stabilizer here:
-
DIY Fig Rig DSLR stabilizer
3:44
Follow along with this video to learn how to make a Fig Rig out of PVC Pipe. This will help enhance your shots by providing stabilization.
Music: Krupa - Intimate
Visit our:
WEBSITE:
FACEBOOK:
GOOGLE +:
TWITTER:
RSS SUBSCRIBE: -
DIY Slider Termurah - Video Test
1:23
Hasil test DIY Slider termurah menggunakan Panasonic TZ-10.
Tutorial DIY Slider:
Setelah menjelajah ke sana ke mari, akhirnya bertemu juga dengan tutorial DIY Slider yg mudah dibuat dan bahan2nya mudah diperoleh di Jakarta.
Bahan:
1. Rel Laci Huben FE-45 60cm Rp. 31.500/pasang
2. Baut 6mm untuk camera mount Rp. 8.000/pack
3. Mur Rp. 5.000/pack
4. Kayu Rp. 3.000
Total Rp. 47.500
Toko:
1. Rel Laci Huben FE-45 bisa dibeli di toko asesoris furniture atau Depo Bangunan. Harga di DB lebih mahal dari harga toko biasa.
2. Baut & mur bisa dibeli di Glodok. Satu pack isi lebih dari 10 pcs.
3. Kayu dibeli dari toko parket. -
How to use GlideCam - Canon DSLR Tip #2
5:41
I will show you how to use and film with a GlideCam in this video!
Get glidecam here for a great deal =
Sunglasses I wear:
Check out my store - for awesome GoPro mounts and accessories
Don't forget to watch in HD!
Comment, Thumbs up, Share, and Subscribe!
-Filmed with Canon 7d; Canon 24mm 1.4 L lens, B+W polarizer filter; RØDE Videopro Microphone, Zacuto LCD view finder by Robert McGee
-Mitch in video - Canon 5d Mark 3; 16-35mm 2.8mm L; B+W polarizer filter; Glidecam HD4000
-Edited on Final Cut Pro 7.0 on Mac by Mitch Bergsma
Cabo, Mexico - December 2013
Canon DSLR Tip / Tutorial Playlist is here now!
Subscribe:
Subscribe to Mitch's Scooter Stuff:
Like me on Facebook:
Like Mitch's Scooter Stuff on Facebook:
Follow me on Instagram:
Follow me on Twitter:
GoPro Tip Playlists
Part 1:
Part 2:
GoPro Tip Intro by: -
DIY Camera Stabilizer
13:35
Most of the ideas came from the following Utube videos:
ReviewOutdoorGear:
John Coffey:
Total spent was about $65 in nuts, washers, nobs and bolts. I didn't have any hardware exept an old tripod that didn't work anymore.
There are many others where I got ideas, but most came from these videos. Thanks to *Miller's Scateboard shop* for having the parts that I needed. -
Cara Membuat Drone Quadcopter dan Menerbangkan
9:17
Saya membuat dan merakit sebuah drone pesawat tanpa awak tapi dengan remote yaitu quadcopter dengan menggunakan bahan untuk body atau rangka nya menggunakan aluminium jemuran.
Dengan bahan bahan yang murah seperti disebutkan pada video yaitu esc, fc, battery, motor brushless dan lainnya kita sudah bisa merakit sebuah quadcopter murah dengan kestabilan yang tidak kalah dengan quadcopter pabrikan yang sudah jadi. -
DSLR Camera Stabilizer for Under $5 - Homemade Film School
2:27
Watch all 3 parts to create your own DIY Camera Stabilizer.
NEXT WEEK: Teenage Mutant Ninja Turtles! -
Watch Part 2: Build
Watch Part 3: Shoot
Dustin McLean shows you exactly how to make a homemade Handheld Camera Rig for $5. Part 1 covers all the Preparation. Part 2 shows you how to build the rig. Part 3 gives you examples on how to use the rig in action to deliver highly cinematic shots... for under $5!
Homemade Movies serves up creative remakes of your favorite movies, trailers and original songs. All videos are exact shot-for-shot remakes created at home without any visual effects. It's sweded movie magic from acclaimed director Dustin McLean! Be sure to leave a comment below for what movie you want to see homemade next.
Directed by Dustin McLean
Produced by Jon O'Brien and Dustin McLean
Created by DustFilms
Watch the Video
-
Cara membuat Dome Action Cam
7:38
Cara membuat Dome Sj5000+
Semoga bermanfaat bagi teman-teman pengguna Actioncam dan yang lain... -
Stabilizer Camera MURAH KERE!!! 100 RIBUan
8:15
Haloo guys...
Jadi ini video unboxing stabilizer camera murah atau versi kerenya
Gimana menurut kalian? kira-kira worth to buy ga sih? tulis comment kalian dibawah ya guys
Tonton videonya sampai habis juga
***********************************
Kalau kalian suka videonya silakan dilike, dan SUBSCRIBE juga channelnya biar ga ketinggalan video selanjutnya, jangan lupa berikan pendapat kalian di kolom komentar yaaa.
***********************************
Untuk kalian yang pengen berinteraksi langsung silakan klik link dibawah ini
IG : -
THE BEST Homemade/DIY Glidecam | Part 2 | Update 2015
21:14
An update on the homemade Glidecam. A part 2, if you will. Many updates have been made to the rig, moving it closer and closer to the functionality of an actual Glidecam. Watch the video to see the updates. Leave your comments and suggestions below, we'd love to hear what you think! LINK TO DROPBOX COMING SOON!
Watch the first tutorial here for how to make other parts of this glidecam:
SUMMARY:
0:00 - Intro
0:45 - Cost
2:17 - How do you mount the base plate?
5:50 - Where do you get the base plate?
7:30 - Quick release plate
8:45 - THE NEW GIBMAL!!!!
13:17 - Balancing the gimbal
14:30 - HOW TO MAKE THE NEW GIMBAL
20:00 - Conclusion -
Mainan baru Camera Stabilizer abdassah studio
1:20
Mainan ini mampu membuat pergerakan kamera stabil walaupun dibawa berlari. Sangat cocok digunakan untuk video-video cinematic, buat wedding, video clip atau semacamnya :)
Abdassah Studio, siap mendokumentasikan acara spesial anda dengan kemampuan terbaik kami :) -
$25 DIY Dual Shoulder Mount
10:40
Last week we made a DIY shoulder mount. This week we wanted to take it up a notch and try something we haven't seen done before. What we came up with is something we call the Film Riot .50 Cal! An awesome DIY approach to a shoulder rig.
Quick Release:
YOUR SHOPPING LIST:
1- PVC cutter:
4- 3/4 PVC Elbow:
2- 3/4 PVC couplings:
4- 3/4 PVC tee joints:
2- 3/4 PVC 90 degree elbow Bends:
1- Cover plate:
2- Weight plates: (Click 2.5 lb or 5 lb)
1- Can of black spray paint
4- 3/4 in. x 2 ft. PVC pipe:
1- All purpose cement:
1- 3/4 6ft Armacell:
8- #6 - 32 x 2 in Machine Screws:
/h_d2/ProductDisplay?langId=-1&storeId;=10051&catalogId;=10053
8- #6 - 32 Machine nuts:
1- Drill bit:
A Drill
A Heat Gun
--------------------
Watch the Film Riot crew make a $20 DIY DSLR Should Rig here:
Like, Favorite and SHARE today's episode!
FilmRiot
Twitter
Ryan on Twitter
Facebook
Ryan on Facebook
-
Ide Kreatif Camera Stabilizer Dolly Homemade
9:36
Bagaimana cara membuat camera stabilizer Dolly murah dari pipa PVC???
Hello teman-teman, pernahkah kalian berpikir bagaimana cara merekam video dengan hasil yang lembut, halus dan tanpa goncangan???
Untuk membuatnya, kita membutuhkan sebuah alat stabilizer yang disebut camera dolly atau camera slider.
Dengan alat ini kita bisa merekam video dengan gerakan memutar dan tetap menghasilkan gerakan yang halus dan lembut.
Untuk lebih jelasnya silakan disimak video ini sampai dengan selesai. Apabila ada yang kurang jelas silakan tinggalkan komentar dibawah.
Semoga bermanfaat...
Silahkan klik tombol Langganan atau Subscribe di atas untuk berlangganan...
-
DIY PVC DSLR Camera Stabilizers
7:05
I put together two different camera stabilizers made by PVC after watching a couple of tutorials by FrugalFilmMaker & Knoptop. I have posted the links to their tutorials in the video as well as below.
Personally, I have found that both of the rigs are extremely easy to put together and took me about 1 hour to complete the both of them. Also, they are really easy to customize and in the middle of putting them together I decided to make some last-minute changes to the way I was building them and personalized them a bit more to fit my needs.
Feel free to leave your thoughts and comments below and be sure to watch their videos in order to support the great effort they put into helping all of us in saving hundreds of dollars with their great and east to follow tutorials!
FrugalFilmMaker - Camera Stabilizer Rig for Under $5 :
Knoptop - $15 Camera Stabilizer:
Channel Shirts:
Contribute to our Translations:
Follow Us:
Website:
Seven Sins Salon:
YouTube:
Facebook:
Instagram:
Twitter:
Google+:
Tumblr:
Flickr:
Vimeo:
Pinterest:
LinkedIn: -
Buat Stabilizer Kamera Versi 2
6:58
stabilizer kamera versi 2 ini berbeda dari yang ada di video yang sebelumnya. versi kali ini ada perubahan pada bagian atas stabilizer.
jika kemarin saya menggunakan head tripod untuk bagian atas, sekarang saya ganti langsung menggunakan pipa pvc dan plastik kotak. dan hasilnya lumayan lebih stabil dari yang sebelumnya.
CARA MEMBUAT STABILIZER KAMERA
sound :
Lumian - The Night (FreeSongsToUse)
-
TUTORIAL:Cara Membuat SteadiCam/Stabilizer Camera Gimbal Murah 150Rb-DIY
23:52
Memanfaatkan hasil limbah, dari pipa alumunium jemuran pakaian. menjadi StadyCam/Stabilizer Camera yang tentunya hasil berkualitas. Kw Super haha :v :D
Untuk list detail bahan-bahan nya bisa hub.
Wa: 0838-6598-9721
Jangan Lupa
Like, Share, Coment & Subcribe ^_^
Terimakasih Telah Menonton
~Salam Kreatif~ ^_^ -
DIY: DSLR Stabilizer Rig For Under $15
13:15
Part 2 coming soon which I will show some test shots with both the DSLR as well as a GoPro attached. I have also added some materials to the rig to make more professional.
Don't want to spend $300 on a stabilizer for your DSLR? You can build this one for less than $15.
Parts:
4x 1/2 PVC pipe 4 in length
2x 1/2 PVC pipe 6 in length
1x 1/2 PVC pipe 7 1/4 in length
1x 1/2 PVC pipe 3 3/4 in length
1x 1/2 PVC pipe 3 in length
1x 1/2 PVC pipe 2 1/4 in length
1x 1/2 PVC pipe 1 1/2 in length
3x 1/2 PVC T-joints
5x 1/2 PVC 90 degree elbow joints
2x 1/2 PVC 45 degree joints
1x 1/2 PVC plug
1x 1/4-20 machine screw 2 1/2 in length
2x 1/4 nuts
1x 1 spring
By: Devon - Defying Reality™ -
Membuat Slider Camera Multifungsi dan Murah
12:23
Membuat Slider Camera Multifungsi dan Murah (DIY)
Slider camera yang saya buat menggunakan bahan :
1. Pipa besi masing masing berukuran 1 meter
2. Baut panjang 10-12cm
3. Balok kayu (bekas)
4. Bearing / laker 4 biji
5. Siku siku kecil 2 biji
6. Baut kecil untuk pemasangan siku 4 biji
7. Triplek kecil ukuran 8,5x15cm
Tips untuk tahap merekatkan dengan lem tambahkan busa bekas puntung rokok atau tissue agar lebih kuat. Anda bisa mengembangkan alat tersebut tersebut dengan cara anda sendiri sesuai dengan kebutuhan anda. Jika kurang jelas silahkan tanya di kolom komentar. Jangan lupa Like, Subscribe dan Share.
Fb : Munif Amin Romadhon (
Twitter : @MunifAmin89 (
Instagram : @MunifAmin (